Friday, 28 December 2012

Routing

Sadly the Christmas holidays have engulfed me and prevented me doing any more work on the skis!
BUT, before I left Cardiff I managed to get the majority of the routing done.
It was very much trial and error to start with but I think I've got the hang of it now.

Firstly, plane off the bottom of your newly laminated cores. It is important to do this first so there is a good machined edge to work off.

It took a lot longer than I thought as you can't take off more than 1-2 mm at a time. I found its probably best to start at the tips as this is where the majority of the material needs to be removed. To start with the router cradle wasn't touching the jig because there was too much material there but after a few passes I started to see the profile I wanted.


These photos are from the first ski I did where I started in the middle and worked outwards and as you can see I've ended up with a big lip on the end. This will need to be removed but could have been avoided by starting from the outside and working down.

When you're finished your ski base should be nicely smooth and even. It should feel like its been sanded. To achieve this it's best if you do long steady passes over the length of the ski instead of a side to side motion.

The next step is sourcing base materials and making a pressing jig. I'm still looking for a company to make this with a CNC machine but it can be done by hand (it's just less accurate).

Hope everyone is well.

GF

Thursday, 13 December 2012

PRICE

Ahhh the down side to any project!
I'll keep this updated as I go on, partly so you can see how much it costs and partly so I can see how much I'm spending!

Sawn Ash - 3 planks 2700mm X 30mm x 100mm - £12.15 each............£36.75

5L of PVA glue (although this will last me for many projects - £8 (should be £15 but the nice guy in our local market gave me a student ski maker discount!  Apparently he supports this sort of think!! great guy)

Router Jig

While waiting for the skis to finish laminating, I set about making the router jig. This is what allows you to thin out the skis at either end while keeping them fatter underfoot. This results in a strong mounting area for bindings (this means less chance of bindings ripping out) and it also gives the skis a bit more pop.
The jig is made up of 2 parts:
The Rails...
And the Cradle ...
I know that I want the skis to be about 15mm underfoot and about 3mm tip and tail. If I'm honest, the next bit was mostly guess work!
I drew out a line 15mm from the top of a plank of wood, then a line 3mm above that. I marked on the midpoint of the ski and since the ski is symmetrical, everything I did on the front, I did on the back.
From the midpoint i marked a point 30cm away, then another 30cm from that. between these 2 points I drew a diagonal line connecting the top of the piece of wood to the 3mm line.
Basically then all you need to do is have a steady hand and a band saw.
I cut the shape out then cut the plank in half to get 2 identical rails.
I then used off cuts from the core to make the separates you can see in the photo. Nail it all together and boom... Rails.

Next for the cradle. This will run on the rails and keep your router level so the skis are the same thickness across the width. The dimensions really vary on your router but basically it should look like this.

The router should fit snugly between the guide strips and there are 2 strips underneath that means the cradle can fit over the rails without too much movement side to side but enough to slide along the length of the rails.
I routed a hole in the base plate big enough to fit the routing bit through.


All that's left to do now is wait for the core to laminate then I can get onto routing tomorrow!
Oh yeah, and tidy up...

Laminating

So today i got on with laminating the cores together. It's a bit messy but feels like the project is moving forward so it's all good.
As I said yesterday, I used PVA glue instead of a more specific wood glue such as 'no more nails'. Although PVA is used as the friendly, child safe primary school glue, it's actually a bloody good wood glue which, when dry, can claim (much like no more nails) to form a bond stronger than the wood itself!
As I've found out, the benefit of no more nails is that it cures very fast. This is great for holding 2 pieces of wood together but for lamination it's not so ideal.
PVA takes about 24 hours to cure so it allows you a fair amount of cock up time.

For this step I used:
5x G-Clamps
5x 20mmx30mm ash (I cut them to the required length earlier)
A healthy amount of PVA glue.

I bought WAY too much glue but I'm sure that will get used in other projects. In reality a small 0.5L bottle will do a pair of skis with plenty left over.

I lined up the planks next to each other with the edges that needed glue facing up. This way I could pour out some glue and spread it over all of them in one go.
Apply more than you think you need.
Just be careful when you clamp them up that they don't slide around too much. A light tap at either end will even them up.
Another problem i encountered was that each plank twisted slightly as they were clamped. This would be solved with a brace running top and bottom which is clamped shut but I didn't have enough clamps for this!

WHen everything is clamped tight, excess glue should ooze out top and bottom. Leave them like this for 24 hours... have a cup of tea, watch The big bang theory and sleep!


Wednesday, 12 December 2012

In the Workshop

Luckily, as an architecture student, I have access to a fairly well equipped workshop with routers, planers,  pillar drills and a big table saw.
First things first, get a nice smooth edge on the wood. This is important as it's going to be laminated to itself and the rougher the surface the worse it will stick.
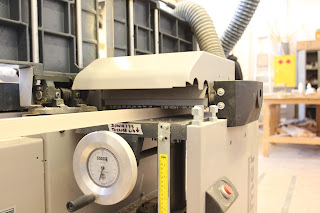
So i put the wood through the planer, shaving 0.5mm with every pass until it was smooth.

After this, my timber was 100mmx 26mm.
Next to the table saw. I cut the timber into 20mm planks, giving me 4 complete planks and one off cut.
The next step is lamination. For this I will use PVA glue, for reasons i will explain tomorrow, and a series of G clamps.
Sadly, the workshop closes at 5 so my working day is rather limited.

GF

Before you start...

Before doing anything else, I worked out what skis I like that are currently available. This way I can borrow the dimensions until I improve my own designs.
Having skid on the Line Afterbangs before I decided to use that shape.
The interesting thing about the lines is that they are laminated like a skateboard. Instead of lining up planks of wood they laminate thin veneers of maple together. This gives more pop and also forms a stronger laminate.
As much as I would love to do this, Maple veneer is very expensive so until i get the process right I think I'll avoid this type of ski.
Instead I chose to adopt a more standard building approach of vertical lamination.
Jewsons, my local timber yard are selling sawn ash, 2700mm x 100mm x 30mm for £12 a plank so I bought 2 of those and am ready to go.
A lot of my knowledge comes from http://www.skibuilders.com/  they are a great site with great step by step guides on how to do this. Although they give a very good guide, I thought I'd do a blog showing each step and covering all of the problems I run into. I'm almost certain it's not as easy as they make it look buy hey ho.

SO... How did i go about making a template?
There's a brilliant piece of software called snocad. I say brilliant... it seems very limited. You put in your desired dimensions, length, waist, tip and tail but after that it's just tweaking nodes until you're happy with the shape.
I plotted this 1:1 to get the shape of my blank as well as the profile. The profile is useful when making the pressing jig. I'll come onto this in a later post.
With this printed out it's time to get into a workshop...